A Beginner's Guide to Building Your Own PC
Discover the essential steps to building your first custom PC, from selecting components to assembling them with confidence.
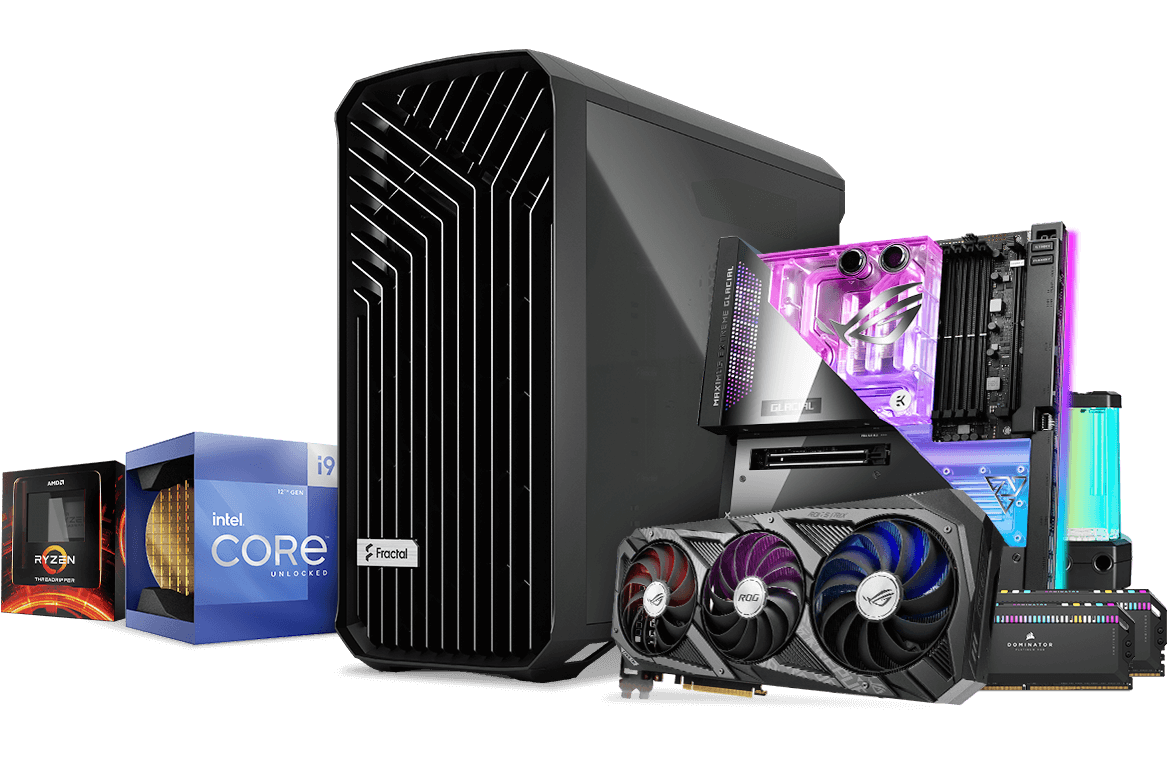
Understanding the Basics
Building your own PC can be a rewarding experience, allowing you to tailor a machine to your specific needs. Before you dive into the assembly, it's crucial to understand the fundamental components of a computer. At its core, a PC consists of a central processing unit (CPU), motherboard, random access memory (RAM), storage devices like SSDs or HDDs, a power supply unit (PSU), and a graphics processing unit (GPU) if you're aiming for high-performance graphics. Each component plays a vital role in the overall performance of your machine. For instance, the CPU is often referred to as the brain of the computer, handling all the calculations. Meanwhile, RAM is the short-term memory, allowing your system to handle multiple tasks simultaneously. Knowing these basics will help you make informed decisions when selecting parts.
Choosing the Right Components
Selecting the right components is a crucial step in building a PC that suits your needs. Start by determining the primary purpose of your PC: is it for gaming, content creation, or everyday tasks? For gaming, you'll need a robust GPU and a high-performance CPU. Content creators might prioritize storage and RAM for handling large files and multitasking. Everyday users can focus on balance and cost-efficiency. Always ensure compatibility between components; for example, the CPU and motherboard must share the same socket type. Additionally, consider the form factor of your case, which will determine the size of the motherboard you can use. Don't forget about the power supply unit; it should have enough wattage to support all your components, with some headroom for future upgrades.
The Assembly Process
Once you have all your components, it's time to assemble your PC. Begin by preparing your workspace with a clean, static-free surface. It's advisable to wear an anti-static wristband to prevent damaging sensitive components. Start by installing the CPU onto the motherboard, followed by the RAM. Carefully mount the motherboard into the case, securing it with screws. Next, install the power supply and connect the necessary cables. The storage devices can be installed into their respective bays or slots. If you have a dedicated GPU, ensure it's seated correctly in the PCIe slot. Cable management is crucial for airflow and aesthetics, so take time to route cables neatly. Once everything is connected, double-check your work before powering on the system.
Installing the Operating System
With your hardware assembled, the next step is to install an operating system (OS). Common choices include Windows, Linux, or macOS (for Hackintosh builds). Begin by creating a bootable USB drive with the OS of your choice. Insert the USB into your newly built PC and power it on. Enter the BIOS by pressing the appropriate key during startup (often F2, Delete, or Esc). Set the boot priority to your USB drive and restart the system. Follow the on-screen instructions to install the OS, selecting the appropriate drive for installation. This process may take some time, so be patient. Once installed, ensure you update your OS and install the necessary drivers for your components to function optimally.
Troubleshooting and Maintenance
Even with meticulous assembly, issues can arise. If your PC doesn't power on, check all cable connections and ensure the power supply switch is on. If you encounter hardware recognition issues, ensure components are seated correctly and BIOS settings are configured properly. Regular maintenance is key to keeping your PC running smoothly. Periodically clean the interior to prevent dust buildup, which can lead to overheating. Keep software and drivers up to date to ensure compatibility and performance. Additionally, consider upgrading components over time to extend the life of your PC. Building your own PC not only provides a custom solution tailored to your needs but also offers a valuable learning experience in computer hardware and software.